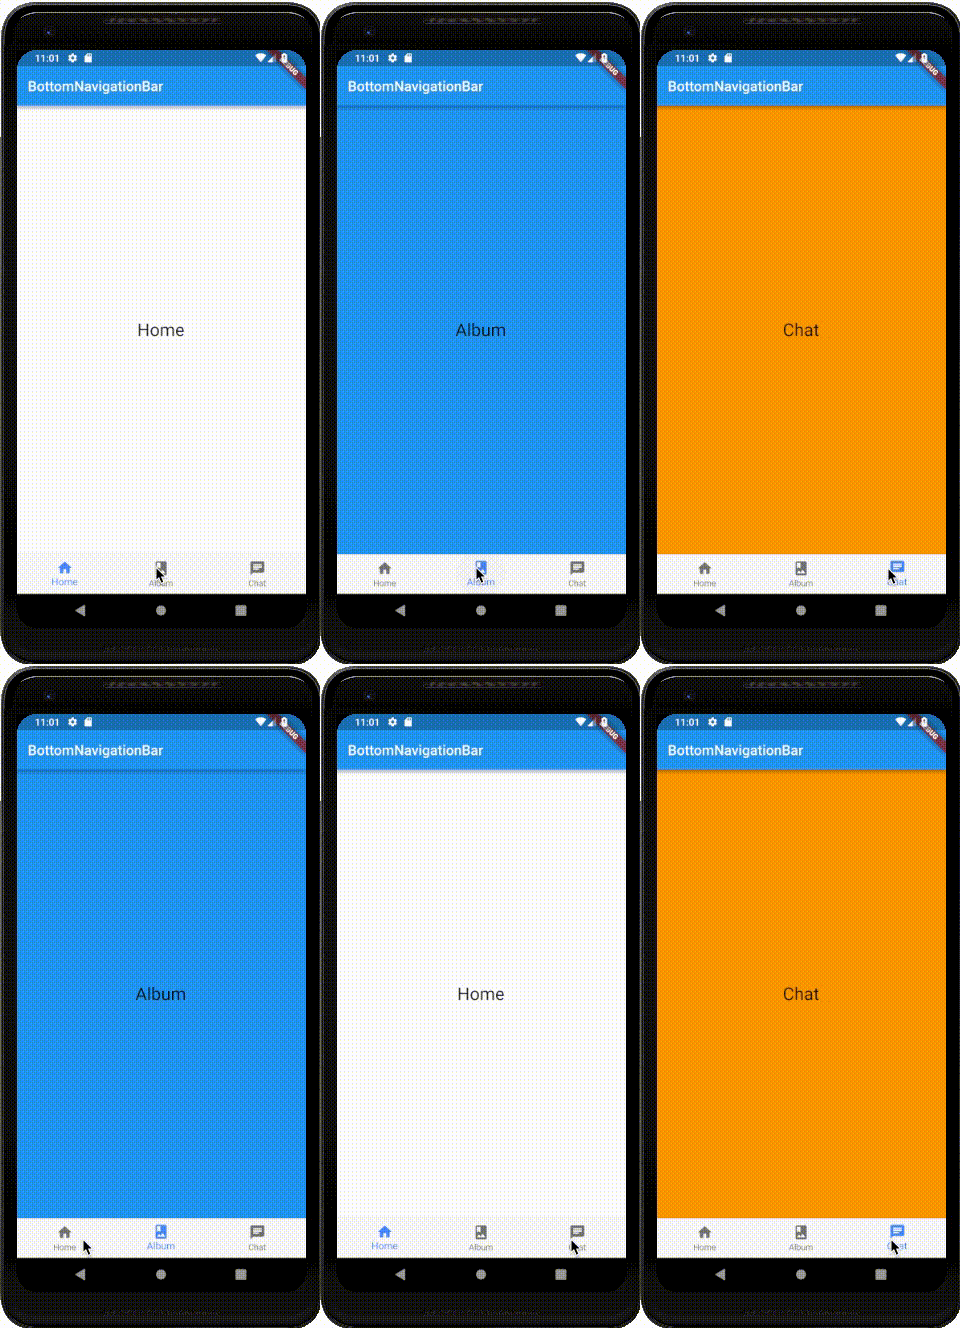
BottomNavigationBar
BottomNavigationBar
画面の下部にナビゲーションメニューを配置する時に利用するのが「BottomNavigationBar」です。
今回は、「BottomNavigationBar」を使ったサンプルを説明していきます。
class _MainPageState extends State<MainPage> {

  int _currentIndex = 0;
  final _pageWidgets = [
    PageWidget(color:Colors.white, title:'Home'),
    PageWidget(color:Colors.blue, title:'Album'),
    PageWidget(color:Colors.orange, title:'Chat'),
  ];

  @override
  Widget build(BuildContext context) {
    return Scaffold(
      appBar: AppBar(
        title: Text('BottomNavigationBar'),
      ),
      body: _pageWidgets.elementAt(_currentIndex),
      bottomNavigationBar: BottomNavigationBar(
        items: <BottomNavigationBarItem>[
          BottomNavigationBarItem(icon: Icon(Icons.home), title: Text('Home')),
          BottomNavigationBarItem(icon: Icon(Icons.photo_album), title: Text('Album')),
          BottomNavigationBarItem(icon: Icon(Icons.chat), title: Text('Chat')),
        ],
        currentIndex: _currentIndex,
        fixedColor: Colors.blueAccent,
        onTap: _onItemTapped,
        type: BottomNavigationBarType.fixed,
      ),
    );
  }

  void _onItemTapped(int index) => setState(() => _currentIndex = index );
}

class PageWidget extends StatelessWidget {
  final Color color;
  final String title;

  PageWidget({Key key, this.color, this.title}) : super(key: key);

  @override
  Widget build(BuildContext context) {
    return Container(
      color: color,
      child: Center(
        child: Text(
          title,
          style: TextStyle(
            fontSize: 25,
          ),
        ),
      ),
    );
  }
}
itemsはメニューボタンとなるウィジェットの一覧を設定します。currentIndexは選択されているIndexです。fixedColorは選択状態の時のアイコンとテキストの色を指定します。typeは選択状態の見た目を変更することができます。onTapはメニューをタップした時のイベントを設定します。
まず、メニュー部分を「BottomNavigationBar」で作成します。
  bottomNavigationBar: BottomNavigationBar(
    items: <BottomNavigationBarItem>[
      BottomNavigationBarItem(icon: Icon(Icons.home), title: Text('Home')),
      BottomNavigationBarItem(icon: Icon(Icons.photo_album), title: Text('Album')),
      BottomNavigationBarItem(icon: Icon(Icons.chat), title: Text('Chat')),
    ],
    currentIndex: _currentIndex,
    fixedColor: Colors.blueAccent,
    onTap: _onItemTapped,
    type: BottomNavigationBarType.fixed,
),BottomNavigationBarには表示するナビゲーションメニューをitemsに「BottomNavigationBarItem」のリストを設定します。
「BottomNavigationBarItem」はメニューとして以下のような要素を定義します。
items: <BottomNavigationBarItem>[
  BottomNavigationBarItem(icon: Icon(Icons.home), title: Text('Home')),
  BottomNavigationBarItem(icon: Icon(Icons.photo_album), title: Text('Album')),
  BottomNavigationBarItem(icon: Icon(Icons.chat), title: Text('Chat')),
],iconはメニューの表示アイコンです。activeIconは選択状態のアイコンを指定します。
これにより、未選択状態のアイコンと選択状態のアイコンを変えることができます。titleはタイトルを表示したい時に記載してください。
次にonTapでアイコンを押された時の動作を作成します。
        onTap: _onItemTapped,
        type: BottomNavigationBarType.fixed,
      ),
    );
  }

void _onItemTapped(int index) => setState(() => _currentIndex = index );今回は、_pageWidgets変数にページの配列を準備しているので、_onItemTappedでは_currentIndexを更新のみをしています。
  final _pageWidgets = [
    PageWidget(color:Colors.white, title:'Home'),
    PageWidget(color:Colors.blue, title:'Album'),
    PageWidget(color:Colors.orange, title:'Chat'),
];これにより、bodyに設定されている_pageWidgetsの対象ページを取得して、画面に表示さ流ようになるので、これで完成です。
body: _pageWidgets.elementAt(_currentIndex),「BottomNavigationBar」は選択時の見た目をtypeによって変えることが可能です。BottomNavigationBar.typeには以下の2種類があり、それぞれ以下のような見た目になるので、使い分けてみてください。
BottomNavigationBarType.fixed,

BottomNavigationBarType.shifting

この時、「BottomNavigationBarItem」の背景色が指定されていないと、真っ白になってしまうので、色指定を忘れずに行いましょう。
items: <BottomNavigationBarItem>[
  BottomNavigationBarItem(icon: Icon(Icons.home), backgroundColor: Colors.blueAccent, title: Text('Home')),
  BottomNavigationBarItem(icon: Icon(Icons.photo_album), backgroundColor: Colors.blueAccent, title: Text('Album')),
  BottomNavigationBarItem(icon: Icon(Icons.chat), backgroundColor: Colors.blueAccent, title: Text('Chat')),
],

