スペシャル
スペシャルで特殊系なヘッダーが思いついたら、のっけていきます。
透過ヘッダー
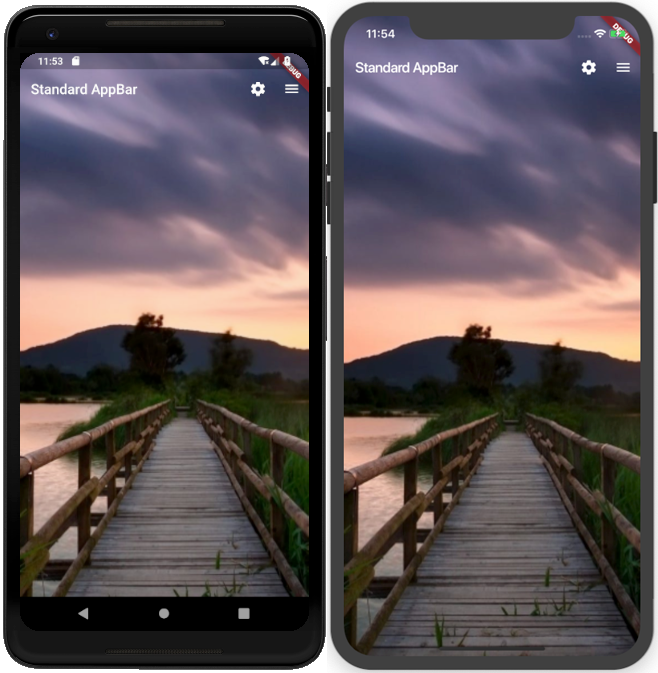
今回実現させたいのは以下のような透過ヘッダーです。
AppBarを透過させる事によりヘッダーを目立たなくさせ、全体の一体感を出しつつ、ヘッダーの機能を残すことができます。
class MyApp extends StatelessWidget {
  @override
  Widget build(BuildContext context)
  {
    return new MaterialApp(
      title: 'Flutter Demo',
      home: Stack(
        children: <Widget>[
          new Container(
            height: double.infinity,
            width: double.infinity,
            decoration:new BoxDecoration(
              image: new DecorationImage(
                image: new AssetImage("assets/background.png"),
                fit: BoxFit.cover,
              ),
            ),
          ),
          Scaffold(
            backgroundColor: Colors.transparent,
            appBar: new AppBar(
              title: const Text("Standard AppBar"),
              backgroundColor: Colors.transparent,
              elevation: 0.0,
              actions: <Widget>[
                IconButton(
                  icon: Icon(Icons.settings),
                  onPressed: () {
                    // Pressed Action
                  },
                ),
                IconButton(
                  icon: Icon(Icons.menu),
                  onPressed: () {
                    // Pressed Action
                  },
                ),
              ],
            ),
            body: new Container(
              color: Colors.transparent,
            ),
          ),
        ],
      )
    );
  }
}※イメージの読み込み設定をしていない場合はこちら
透過ヘッダーを作る時の決め手はStackを使うことです。
Stackについては別で記事を用意しますが、簡単に説明するとWidgetを重ねることができるWidgetです。
これを行う事により、背景の画像を画面全体に配置した上にヘッダーを重ねることができるようになります。
半透過ヘッダー
今回は半透明のヘッダーです。 完全に透過ではなく、ある程度色を残すことでアプリ全体の一体感をつけたり、ヘッダーをはっきりさせることで操作対象をわかりやすくしています。
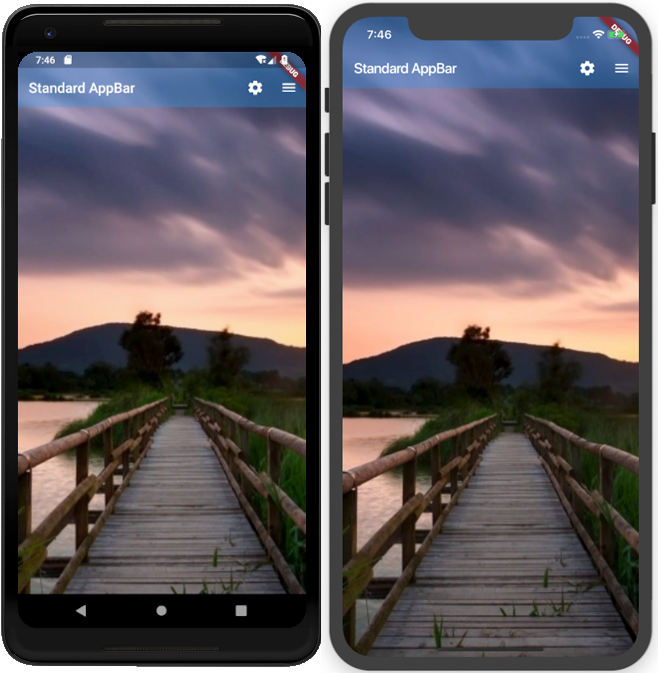
上記「透過ヘッダー」のAppBarにある「backgroundColor」を以下のように変更すると半透明なヘッダーが作成可能です。
  Scaffold(
    backgroundColor: Colors.transparent,
    appBar: new AppBar(
      title: const Text("Standard AppBar"),
      backgroundColor: Colors.blue.withOpacity(0.3),
      elevation: 0.0,
色味については「Colors」クラスを使って設定し、「withOpacity」で透過率を設定しています。
範囲は0~1の間で設定する事によって、透過される割合が変わります。
伸び縮みするヘッダー
スワイプする事でヘッダーの表示、非表示を切り替えるためのサンプルです。
画像などにより印象を強く残しつつ、操作性を損なわないヘッダーが作成可能です。
class MyApp extends StatelessWidget {
  @override
  Widget build(BuildContext context)
  {
    return new MaterialApp(
      title: 'Flutter Demo',
      home: Scaffold(
        body: NestedScrollView(
          headerSliverBuilder: (BuildContext context, bool innerBoxIsScrolled) {
            return <Widget>[
              SliverAppBar(
                expandedHeight: 200.0,
                floating: false,
                pinned: true,
                flexibleSpace: FlexibleSpaceBar(
                    centerTitle: true,
                    title: Text("Collapsing Toolbar",
                        style: TextStyle(
                          color: Colors.white,
                          fontSize: 16.0,
                        )),
                    background: Image.asset('assets/header_picture.png', fit: BoxFit.cover)
                ),
              ),
            ];
          },
          body: Center(
            child: Text("Sample Text"),
          ),
        ),
      )
    );
  }
}
「NestedScrollView」で全体をスクロールできるようにして、「SliverAppBar」を使ってヘッダーを非表示にできるようにしています。